Recently I published an article to the LinkedIn about SharePoint data model. The full article link is here
https://www.linkedin.com/pulse/sharepoint-data-platform-senthamil-selvan
Recently I published an article to the LinkedIn about SharePoint data model. The full article link is here
https://www.linkedin.com/pulse/sharepoint-data-platform-senthamil-selvan
Please follow my prerequisite blog to add the jQuery dependency on the master page. The below jQuery code will work with jQuery dependency.
Followed Documents
In this blog I would explain how to create an animated jquery based document list. The documents listed will be the followed documents within SharePoint. The list will call REST api to get all the followed documents. https://docs.microsoft.com/en-us/sharepoint/dev/general-development/following-people-and-content-rest-api-reference-for-sharepoint read for more information on the api and its parameter.
My code uses the followed parameter filtered by types 2 which is documents only. SharePoint allows to follow different types like site, list, item etc. The api I am using will get only documents https:////_api/social.following/my/Followed(types=2).
You can download the full code here in my github repository. The code repository has 3 type of files .htm, .js &.css files. The htm file has all the html elements needed to load the documents. All the code is in the js file which is invoked in the document ready function. The js file is referred in the htm to invoke. CSS file for the UI and design.
The code uses the several dependency scripts & css, all the dependencies are here in the Github. Vue.js and Bootstrap are optional dependencies. The mandatory dependencies are below
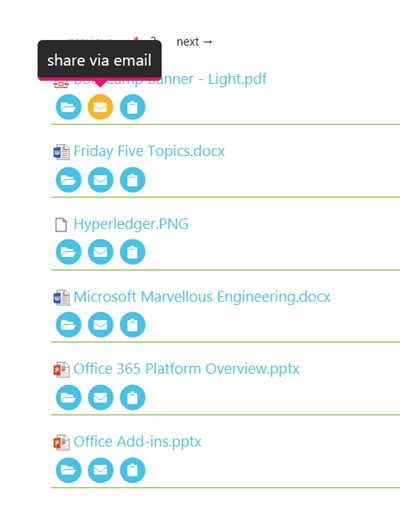
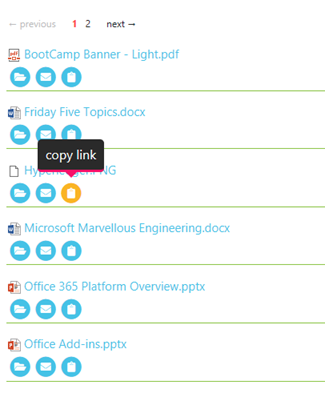
The javascript code uses 2 main function GetFollowingDocuments() & followedRetrieval(). Make sure you change the site collection URL in the GetFollowingDocuments() function to make it to work. Some javascript utility functions are there to support the UI. Like getting the extension picture for specific type of documents. I have covered only few types which are major. If you want to have more types need to add more pic url for each types. Some of sample screenshots below. The png type is unknown icon because I have not handled the image for it. So you can extend those support in the code GetImagePath()
Please follow my prerequisite blog to add the jQuery dependency on the master page. The below jQuery code will work with jQuery dependency.
SharePoint people profile will have all the details about the peers and the manager. The below jQuery code will call the REST api to get all the peers and the manager and display in the html tag.
The below code uses the addition javascript reference /_layouts/15/sp.UserProfiles.js for the profile api
You can also download the full code from the Github

$(function () {
    GetMyTeamDetails();
});

function GetMyTeamDetails() {
    var siteUrl = _spPageContextInfo.webAbsoluteUrl + "/_api/SP.UserProfiles.PeopleManager/GetMyProperties";
    console.log(siteUrl);
    $.ajax({
        url: siteUrl,
        headers: {
            Accept: "application/json;odata=verbose"
        },
        success: function (data) {
            try {
                var peers = data.d.Peers.results;
                for (var i = 0; i < peers.length; i++) {
                    $("#peers").append(peers[i]);

                } // end of for loop

                var managers = data.d.ExtendedManagers.results;
                for (var i = 0; i < managers.length; i++) {
                    $("#manager").append(managers[i]);
                } // end of for loop
            } catch (err2) {
                alert(JSON.stringify(err2));
            }
        },
        error: function (jQxhr, errorCode, errorThrown) {
            alert(errorThrown);
        }
    });
}
Please follow my prerequisite blog to add the jQuery dependency on the master page. The below jQuery code will work with jQuery dependency.
Download the files from the Github repository and make sure the Vue.js dependency is added to the Master Page. The master page sample uploaded don’t have the Vue.js reference so please add it to the master page.
Step 1:
Upload the VueSample.js and VueFile.htm to the siteassets/scripts folder.
Step 2:
Using the SliderList.stp create the List in the SharePoint site. In my case I created the List with the name BootstrapSlider.

Step 3:
Create the Page called VueJS Sample.aspx in the site. I create under the site ms so the URL will be https:///ms/SitePages/VueJs%20Sample.aspx
In the page add the content editor webpart and add the link to the /siteassets/scripts/vuefile.htm. The htm file have the necessary html content to load the data, vueSample.js file have the java script code to call the REST api from List.

Click on the Get Items to load the date from the List. The Get Items code call the REST api from the List and load the data in the bootstrap table format.

$(document).ready(function () {

  var app = new Vue({
    el: '#appvue2',
    data: {
      message: 'Click the button to see feedbacks',
      feedbackList: [],
      sliderContents: []
    },
    methods: {
      getSliders: function () {
        this.message = "Calling the slider function...";
        var endPointUrl = _spPageContextInfo.webAbsoluteUrl + "/_api/web/lists/getbyTitle('BootstrapSlider')/items";
        var headers = {
          "accept": "application/json;odata=verbose"
        };
        $.ajax({
          url: endPointUrl,
          type: "GET",
          headers: headers,
          success: data => this.sliderContents = data.d.results
        }); // jquery ajax
        this.message = "Success";
        console.log(this.sliderContents);
      } // getSliders end
    } // methods end
  }); // vue end
}); // doc ready end
Please follow my prerequisite blog to add the jQuery dependency on the master page. The below jQuery code will work with jQuery dependency.

In this blog I will discuss how to use jQuery to auto complete the people field with the input person manager property. To do it please follow below steps
Navigate to my Github URL to download the below files from the repository
Upload the Leave App.stp to the List template Gallery. Then Create a list using the template uploaded. In my case I Created a list with name Leave Application.
Upload the files getmanager.js & getManagerHtml.txt to the Site Assets library under the site content. Usually I will create a folder scripts under Site Assets library to upload the files. So the sample below will use the siteassets/scripts/<file name>. If you uploading the file to different library make sure you change the path in the getManagerHtml.txt file.
Navigate to the List “Leave Application” you have created in Step 1: In my case it is under URL https://<sitecollection>/ms/Lists/Leave%20Application/AllItems.aspx , /ms is the subsite name I am using. In your case it may be different based on site name. Click on New Item to open the New Item form.

Locate the top settings icon and click on it to open Edit Page. This will allow to add webpart to the edit form. Add the content editor webpart. In the content editor webpart edit it to add the getManagerHtml.txt file path to it. After adding the Path save the Page.

So now the script will add the Get Manager button at run time next to the Input field. But before that you should set the correct ID of the control in the getManagerHtml.txt. Now go to the Site Assets library and then to the getManager.js file. Open the getManager.js in the favourite editor you have. You can open even in notepad. In my case I use the Visual Studio code to open the file. You can Map the folder to the Network drive to open it easier in VS code. The ID marked below in the picture has to be replaced by your ID.

To find out the ID use the developer tool in the browser to identify. I use Edge and F12 key to open the developer tool. Once you identify the ID replace it in the js file and save the file.

Once the changes are saved in the getmanager.js file, go back to the Leave Application New Item page and refresh. Now you should be able to see Get Manager button. Type the Name in the Applying People. Then click on the Get Manager button to auto fill the Manager on the Manager People Picker. The code will auto fill and then will make the control disable.
The Java Script code actually uses the People Manager api to get the Applying People control details. Get the Account name and call to the people manager API to get the manager. Once the Manager field is retrieved from CSOM it sets it to the People picker and automatically resolve the name in the control. You can modify the code to get other details if you wanted to.
Hope this works!!!
Please follow my prerequisite blog to add the jQuery dependency on the master page. The below jQuery code will work with jQuery dependency.

In this blog the jQuery code will get the terms from a specific termset. Each term will have a local property cssclass & cssfname. The JSOM code will get the custom property and create a bootstrap button navigation. Term ID will be a Query string for navigation.
The Navigation termset on the screenshot is created dynamically based on the Taxonomy. The color of button asp.net, azure, crm, sharepoint are colored based on the CSSCLASS property from the term.

Navigate to my Github to download the files. The Github has the termsetHtml.txt & termsetScript.js
Upload both the files to SiteAssets-> Scripts folder. Create Scripts folder inside the Site Assets to upload. If you are not using scripts folder make sure you change the path in termsetHtml.txt
Now add the Content Editor webpart to the Page. Edit the content editor webpart and add the full path of the termsetHtml.txt file. Save the webpart and page. If the reference to jquery, js and code are correct the termset will be loaded and color based on css name


Before proceeding please read the prerequisite blog posted by me. Need to setup the referenced js and css files in the master page. If you don’t want to add in master page. Please add those in the txt file which is added below.
Navigate to Github to get the files required for this Review / Feedback jQuery
The Github have following files
Upload the list template to the site and create the Feedbacks list. The js code will get the list instance by the title Feedbacks so use the name Feedbacks while creating the List
In my case the site url is https://<sitecollection>/ms/ so navigate the site assets under your site where you want the review component. Under Site Assets create a folder called scripts. Under the scripts folder upload both the js and the txt file, that is feedbackhtml.txt and feedbackmaster.js. If you don’t want to upload to siteassets ->scripts folder make sure you change the path of the js file. The js file path must be the folder you are using.

After the files are uploaded to the scripts folder. Go to the page where you want the review jquery app. Edit the pager and add the content editor webpart to the page. Edit the webpart and in the path text enter the full path to the txt file. https://<sitecollection>/ms/siteassets/scripts/feedbackhtml.txt . Now save the webpart and the page. If dependency js, css are correct and the path to feedbackMaster.js is correct the feedback / review will be displayed as per the gif picture above.
The javascript uses the site url for the variable. Make sure you point to your site path. In my case the site url is /ms

This blog gives you step by step details on how to set the document library web part view to specific sub folder. OOB SharePoint online does not support view to show the sub folder of the document library. This can be achieved in 2 ways
In this blog I will show how to change the view Query using the JavaScript. Below are the steps to achieve
Step 1: Create a view to the document library
Step 2: Get the View GUID
Step 3: Create a Page to execute JavaScript
Step 4 Create Page to add document library Webpart
Follow the below steps to run the script to modify the view. This script needed to be run just once to change the view. Once the view is changed the web part view will use the query to show the sub folder.
Create a document library and create a view to be able to use it in the web part. In the below scenario I am using the Shared Documents library and created the FolderView.aspx. This folderview.aspx is a normal view created for the document library.

This folderview.aspx will be changed to show the documents inside the MyFolder folder.
To get the view GUID, edit the folderview.aspx and scroll down to the last to see the GUID. This is the GUID of the view in my case “41770fbe-48c8-4541-9629-cf6119f81c02“

Execute the javascript using the Script Editor webPart. Add the Embed Code and the below script.

https://github.com/msisgreat/js/blob/master/WebPartViewJs.txt
///////////////////////////
<script type='text/javascript'>
var context = new SP.ClientContext.get_current();
web = context.get_web();
list = web.get_lists().getByTitle('Documents');
var webPartView = list.getView('{41770fbe-48c8-4541-9629-cf6119f81c02}');
context.load(list);
context.load(webPartView);
context.executeQueryAsync(Function.createDelegate(this, addWebPartSuccess), Function.createDelegate(this, addWebPartFail));
function addWebPartSuccess(sender, args) {
if (webPartView) {
 alert('webpartview valid');
 webPartView.set_scope(2); // recursiveall
 webPartView.set_viewQuery('MyFolder');
 webPartView.update();
 context.load(webPartView);
 context.executeQueryAsync(Function.createDelegate(this, updateSuccess), Function.createDelegate(this, updateFailed));
//alert('call finished');
 }
else {
 alert('Unable to get view');
 }
}
function addWebPartFail(sender, args) {
 alert('web part failed');
}
function updateSuccess(sender, args) { alert('changed the view'); }
function updateFailed(sender, args) { alert('Request failed. ' + args.get_message() + '\n' + args.get_stackTrace()); }
</script>
///////////////////////
If the below message is shown, then the view is changed.


Create the page to add the web part for the document library. In my case I created the page called Sub Folder View from the SitePages library

After adding the webpart below is the view

Once the page is added and selected the FolderView the webpart will show the sub folder.

