Category Archives: Popular

Most viewed / popular post

Surface Go Unboxing & My Personal Review

This blogpost is my 100th blog. Celebrating my 100th blog with my new Surface Go (4 GB model). Actually this blog was written using Surface Go.

Release Date in Singapore 28th Aug 2018
Shipped Date 31 Aug 2018
Price SGD (including type cover) S$ 725.10 (this is 10% student price)

Unboxing the Surface Go

Below are the items included in the Box

  1. Surface Go device
  2. Power Supply
  3. Starter Guide
  4. Warranty details

Surface Go devices are mainly targeted for Students to make it easy to carry, light weight and productive during the classes. The Windows 10 configuration has optimized settings specific to education sector. There is a very good article around it here

The Surface Go has below ports

  1. 1 x USB-C
  2. 3.5 mm headphone jack
  3. 1 x Surface Connect port
  4. Surface Type Cover port
  5. microSDXC card reader

Full Tech Spec – My Surface Go

Software Windows 10 Home (Out of S mode)

Microsoft Office 365 Home – My Live subscription

Dimensions 9.65″ x 6.90″ x 0.33″ (245 mm x 175 mm x 8.30 mm)
Weight Starting at 1.15 lbs (522 g), not including Type Cover
Storage eMMC drive: 64GB
Display Screen: 10″ PixelSense™ Display

Resolution: 1800 x 1200 (217 PPI) resolution

Aspect ratio: 3:2

Contrast ratio: 1500:1

Touch: 10-point multi-touch

Corning® Gorilla® Glass 3

Battery life Up to 9 hours of battery life – I am yet to test that
Processor Intel® Pentium® Gold Processor 4415Y
Security TPM 2.0 for enterprise security

Enterprise-grade protection with Windows Hello face sign-in

Memory 4GB
Wireless Wi-Fi: IEEE 802.11 a/b/g/n/ac compatible

Bluetooth Wireless 4.1 technology

Connections 1 x USB-C

3.5 mm headphone jack

1 x Surface Connect port

Surface Type Cover port

microSDXC card reader

Cameras, video, and audio Windows Hello face authentication camera (front-facing)

5.0MP front-facing camera with 1080p Skype HD video

8.0MP rear-facing autofocus camera with 1080p HD video

Single microphone

2W stereo speakers with Dolby® Audio™ Premium

Graphics Intel® HD Graphics 615
Exterior Casing: Magnesium

Color: Silver

Physical buttons: Volume, Power

Sensors Ambient light sensor

Accelerometer

Gyroscope

Magnetometer

My Reviews

First Look

The device looks super cute with the slim down in size. You can visualize the sizes between devices in the below picture. The device has smooth curved edges compared to Surface Pro. Compared to other tablets in market this one is slightly thicker.

Pros:

Smaller and Handy (245 mm x 175 mm x 8.30 mm)

Light weight (522 g)

Fit easily to your hand bag and carry

Comes with built in stand, easy to work

Cons:

Slightly thicker than usual tablets.

Backward Compatibility & Features

Once I unbox the Go device I try to plug in to my Surface Dock, you guess what it works like charm. Any USB devices connected to Dock works too. I even tried to charge using the Surface Pro charger and it works. The Type C port is easy to extend multiple monitors. Surface Pen and the Surface Dial also works without any glitch. It has a Micro SD slot at the back hidden behind stand like in Surface Pro.

Pros:

Works with Surface Dock

Works with Surface Pen, Dial and Surface Pro charger.

Micro SD slot available

Type C port for Extension

Cons:

No USB port , you need to buy Type C to USB in case you want to connect any external devices.

CPU Performance

To identify the performance, I used 2 benchmark tools GeekBench 4 and the NovaBench. Both tools have their own benchmark scores for CPU, Memory and GPU. Below is the screenshot of the tool results.

The benchmark score shows Surface Go performs on much better than $500 USD priced Laptop models. It scores better in GPU and graphics.

Using Novabench Tool for getting the benchmark of performance. The Novabench tool will have its own score to come up with the benchmark.

Set Document Library Webpart to Specific Folder – SharePoint Online

This blog gives you step by step details on how to set the document library web part view to specific sub folder. OOB SharePoint online does not support view to show the sub folder of the document library. This can be achieved in 2 ways

  1. By changing the view page Query using the SharePoint Designer
  2. Java Script to modify the view Query to sub folder.

In this blog I will show how to change the view Query using the JavaScript. Below are the steps to achieve

Step 1: Create a view to the document library

Step 2: Get the View GUID

Step 3: Create a Page to execute JavaScript

Step 4 Create Page to add document library Webpart

Follow the below steps to run the script to modify the view. This script needed to be run just once to change the view. Once the view is changed the web part view will use the query to show the sub folder.

Step 1:

Create a document library and create a view to be able to use it in the web part. In the below scenario I am using the Shared Documents library and created the FolderView.aspx. This folderview.aspx is a normal view created for the document library.

This folderview.aspx will be changed to show the documents inside the MyFolder folder.

Step 2:

To get the view GUID, edit the folderview.aspx and scroll down to the last to see the GUID. This is the GUID of the view in my case “41770fbe-48c8-4541-9629-cf6119f81c02

Step 3:

Execute the javascript using the Script Editor webPart. Add the Embed Code and the below script.

Script

https://github.com/msisgreat/js/blob/master/WebPartViewJs.txt

///////////////////////////

<script type='text/javascript'>
var context = new SP.ClientContext.get_current();
web = context.get_web();
list = web.get_lists().getByTitle('Documents');
var webPartView = list.getView('{41770fbe-48c8-4541-9629-cf6119f81c02}');
context.load(list);
context.load(webPartView);
context.executeQueryAsync(Function.createDelegate(this, addWebPartSuccess), Function.createDelegate(this, addWebPartFail));
function addWebPartSuccess(sender, args) {
if (webPartView) {
 alert('webpartview valid');
 webPartView.set_scope(2); // recursiveall
 webPartView.set_viewQuery('MyFolder');
 webPartView.update();
 context.load(webPartView);
 context.executeQueryAsync(Function.createDelegate(this, updateSuccess), Function.createDelegate(this, updateFailed));
//alert('call finished');
 }
else {
 alert('Unable to get view');
 }
}
function addWebPartFail(sender, args) {
 alert('web part failed');
}
function updateSuccess(sender, args) { alert('changed the view'); }
function updateFailed(sender, args) { alert('Request failed. ' + args.get_message() + '\n' + args.get_stackTrace()); }
</script>

///////////////////////

If the below message is shown, then the view is changed.


Step 4:

Create the page to add the web part for the document library. In my case I created the page called Sub Folder View from the SitePages library

After adding the webpart below is the view

Once the page is added and selected the FolderView the webpart will show the sub folder.

Move Search Components To Different Server in SharePoint 2013

SharePoint 2013 Search components are very scalable. Now you can move the components from the search to different servers which it is running. In SharePoint farm environment usually the Application Server will host all the Services including the Search Application services. The Search Application consists of several Search components like

  • Admin
  • Crawler
  • Content Processing
  • Analytics processing
  • Query Processing
  • Index

The movement of the components to another server is not possible from the Central Administration. The Search Topology does not provide any option to move. So these can be done using the PS commands.

Farm before movement

image

Farm After Movement

image

Below is the PS script for the activity.

$ssa = Get-SPEnterpriseSearchServiceApplication
$active = Get-SPEnterpriseSearchTopology -SearchApplication $ssa -Active
$clone = New-SPEnterpriseSearchTopology -SearchApplication $ssa -Clone –SearchTopology $active

$Srv2 = Get-SPEnterpriseSearchServiceInstance -Identity “Server Name Here
New-SPEnterpriseSearchQueryProcessingComponent -SearchTopology $clone -SearchServiceInstance $Srv2
New-SPEnterpriseSearchAnalyticsProcessingComponent -SearchTopology $clone -SearchServiceInstance $Srv2
New-SPEnterpriseSearchContentProcessingComponent -SearchTopology $clone -SearchServiceInstance $Srv2
New-SPEnterpriseSearchCrawlComponent -SearchTopology $clone -SearchServiceInstance $Srv2

Start-SPEnterpriseSearchServiceInstance -Identity $Srv2
Set-SPEnterpriseSearchTopology -Identity $clone
—————-
Clone again to remove original

$ssa = Get-SPEnterpriseSearchServiceApplication
$active = Get-SPEnterpriseSearchTopology -SearchApplication $ssa -Active
$clone = New-SPEnterpriseSearchTopology -SearchApplication $ssa -Clone –SearchTopology $active

Get-SPEnterpriseSearchComponent -SearchTopology $clone  — to get the component id for the subsequent commands

Remove-SPEnterpriseSearchComponent -Identity  COMPID -SearchTopology $clone -confirm:$false
Remove-SPEnterpriseSearchComponent -Identity COMPID -SearchTopology $clone -confirm:$false

Set-SPEnterpriseSearchTopology -Identity $clone

—–

Replace the Server Name Here with the server you want to move

COMPID i the old component id of the search component to be removed. You can get all component running on the server by using the command

Get-SPEnterpriseSearchComponent -SearchTopology $clone

I followed the post from this blog http://stevemannspath.blogspot.ch/2013/03/sharepoint-2013-search-moving-query.html

How to find Concurrent Users for SharePoint and ASP.NET using IIS Logs

This post is about finding the number of concurrent users. The concurrent users helps to do the capacity planning for SharePoint. Below are the main attributes required to do the capacity planning for SharePoint 2010/2013.

Average daily RPS

Average RPS at peak time

Total number of unique users per day

Average daily concurrent users

Peak concurrent users at peak time

Total number of requests per day


One of the main attribute for the planning is the Concurrent users. Below are the steps required to find the concurrent users

  1. Enable the IIS Logs in the server
  2. Collect the logs for particular period
  3. Install Log Parser Tool
  4. Analyse the Log file using the Log Parser.
  5. Finally can plot a graph or use the data in any form

You can download the load.txt and the bat file in the skydrive

Step 1:

Before collecting the IIS log files, make sure the below attributes are enabled in the IIS. These attributes are the key to do analysis. The below fields can be enabled in IIS.

Field

Column name

Date

date

Time

time

Client IP Address

c-ip

User Name

cs-username

Method

cs-method

URI Stem

cs-uri-stem

Protocol Status

sc-status

Protocol SubStatus

sc-substatus

Bytes Sent

sc-bytes

Bytes Received

cs-bytes

Time Taken

time-taken

User Agent

cs-user agent

IIS Log

Step 2:

After enabling the necessary attributes, allow the application to be used for few days. After few days collect the IIS log from the c:\inetpub\logs\logfiles\. The log files will be scattered with multiple directories. Usually it is better to set s particular directory to the IIS site for easy gathering of log files. The log files will be *.log extension. Usually the analysis is done out of the server. So collect all the files and copy it to the local desktop for analysis.

Step 3:

Install the log parser tool in the local laptop or the desktop where the log files are collected. The log parser can be downloaded from the below location

http://www.microsoft.com/en-us/download/details.aspx?id=24659

After installing the logparser better to add the logparser exe path to the environment Path folder. It will be easy to execute the logparser from any directory from command prompt if added the path to environment variable PATH.

Step 4:

To get the concurrent users follow the below steps

Copy the below text into the Load.txt file

select EXTRACT_FILENAME(LogFilename),LogRow,

date, time, cs-method, cs-uri-stem, cs-username, c-ip, cs(User-Agent), cs-host, sc-status, sc-substatus, sc-bytes, cs-bytes, time-taken,

add(
   add(
      mul(3600,to_int(to_string(to_localtime(to_timestamp(date,time)),’hh’))),
      mul(60,to_int(to_string(to_localtime(to_timestamp(date,time)),’mm’)))
   ),
   to_int(to_string(to_localtime(to_timestamp(date,time)),’ss’))
) as secs,

to_int(to_string(to_localtime(to_timestamp(date,time)),’yy’)) as yy,
to_int(to_string(to_localtime(to_timestamp(date,time)),’MM’)) as mo,
to_int(to_string(to_localtime(to_timestamp(date,time)),’dd’)) as dd,

to_int(to_string(to_localtime(to_timestamp(date,time)),’hh’)) as hh,
to_int(to_string(to_localtime(to_timestamp(date,time)),’mm’)) as mi,
to_int(to_string(to_localtime(to_timestamp(date,time)),’ss’)) as ss,

to_lowercase(EXTRACT_PATH(cs-uri-stem)) as fpath, 
to_lowercase(EXTRACT_FILENAME(cs-uri-stem)) as fname, 
to_lowercase(EXTRACT_EXTENSION(cs-uri-stem)) as fext

from *.log

where sc-status401

After copying the above text into load.txt run the log parser. Assume that all the IIS files are in the c:\iislogs\. Run the command prompt in admin mode. use the commnd to navigate to the log folder say cd c:\iislogs.

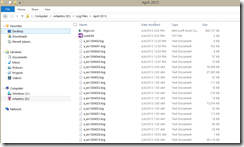
In my case the log files are in d:\log files\april 2013

image

image

Run the below command in the command prompt to create a bigo.csv in the log folder which later can be used for analysis.

logparser -i:IISW3C file:load.txt -o:csv -q >bigo.csv

The above command will create a bigo.csv in the folder. I have created a bat file based on the blog mentioned here http://blogs.msdn.com/b/markarend/archive/2012/02/24/measuring-concurrent-site-users.aspx

Create a Batch file named ConCurrentUser.bat and add the below script into it

SET inputCSV=%1
if ‘%inputCSV%’==” GOTO USAGE

REM outputCSV has no extension, it’s added later
SET outputCSV=UserConcurrency

SET concurrencyPeriod=%2
if ‘%concurrencyPeriod%’==” GOTO USAGE

SET concurrencyField=%3
if ‘%concurrencyField%’==” SET concurrencyField=c-ip

REM Set a filter to match requests that should be excluded
REM %%Service%% matches our service accounts (like search), exclude them
REM …if you don’t want a filter, use SET filter=0 IS NULL
SET filter=(cs-username LIKE ‘%%Service%%’)

echo.
echo Counting Concurrent Users
echo inputCSV         : %inputCSV%
echo outputCSV        : %outputCSV%.csv
echo concurrencyField : %concurrencyField%
echo concurrencyPeriod: %concurrencyPeriod% seconds

echo.
echo First stage, quantizing to %concurrencyPeriod% seconds…
logparser -i:CSV -o:CSV “SELECT DISTINCT %concurrencyField%, date, QUANTIZE(TO_TIMESTAMP(time,’hx:mx:sx’), %concurrencyPeriod%) AS Period, COUNT(*) as Requests INTO temp1-%outputCSV%.csv FROM %inputCSV% WHERE %concurrencyField% IS NOT NULL AND NOT %filter% Group By  Date, Period, %concurrencyField%”

echo.
echo Second stage, grouping…
logparser -i:CSV -o:CSV “SELECT date, to_string(to_timestamp(Period,’hx:mx:sx’),’hh’) as Hour, Period, count(%concurrencyField%) as UserCount, sum(Requests) as RequestCount INTO temp2-%outputCSV%.csv From temp1-%outputCSV%.csv Group by date, Period”
logparser -i:CSV -o:CSV “SELECT Hour, avg(UserCount) as Concurrent-Users(q%concurrencyPeriod%), sum(RequestCount) as Total-Requests(q%concurrencyPeriod%) INTO %outputCSV%-%concurrencyPeriod%.csv From temp2-%outputCSV%.csv GROUP BY Hour ORDER BY Hour”

GOTO DONE

:USAGE

echo.
echo # Usage:
echo #
echo # ConcurrentUsers inputCSV seconds [fieldname]
echo #
echo # inputCSV : csv file (or *.csv) of log entries with fields: date, time, c-ip or [fieldname], other
echo # seconds  : concurrency quantization level.  Typical values 300 and 600 seconds
echo # fieldname: field to evaluate for concurrency.  Typical values c-ip (default) and cs-username
echo #
echo # Example  : ConcurrentUsers BigO.csv 300
echo.

:DONE

Now run the below command in the command prompt to get the concurrent users for multiple periods

ConcurrentUser BigO.csv 300

ConcurrentUser BigO.csv 1200

ConcurrentUser BigO.csv 3600

Using the result from the above command we can plot the graph in the excel.

Graph

C# Enum To String Using Attributes

There are certain situation we need to have custom string value to a Enum and later need to retrieve the string value. The string value should be independent of the enum constant. The below example will use the system.attribute class to achieve this.

Step 1: Declare a Enum

public enum GameConsole
{
    PSP=0,
    PS2=1,
    XBOX=2,
    Nitendo=3
}

Step 2: Create a custom Attribute called EnumValue

public class EnumValue : System.Attribute
{
    private string _value;
    public EnumValue(string value)
    {
         _value = value;
    }
    public string Value
    {
        get { return _value; }
    }
}

Step 3: Create a example to retrieve a attribute value

public static class EnumString
{
    public static string GetStringValue(Enum value)
    {
    string output = null;
    Type type = value.GetType();
    FieldInfo fi = type.GetField(value.ToString());
    EnumValue[] attrs = fi.GetCustomAttributes(typeof(EnumValue),false) as EnumValue[];
    if (attrs.Length > 0)
    {
        output = attrs[0].Value;
    }
        return output;
    }
}

Step 4: Change the Enum to add the string with attribute

public enum GameConsole
{
    [EnumValue(“Play Station Portable”)]
    PSP=0,
    [EnumValue(“Play Station 2”)]
    PS2=1,
    [EnumValue(“Microsoft Gaming Console”)]
    XBOX=2,
    [EnumValue(“WII Nitendo”)]
    Nitendo=3
}

Step 5: Get the Enum Attribute value

String enumStringValue = EnumString.GetStringValue(GameConsole.PSP);